https://computername:port/svn/.
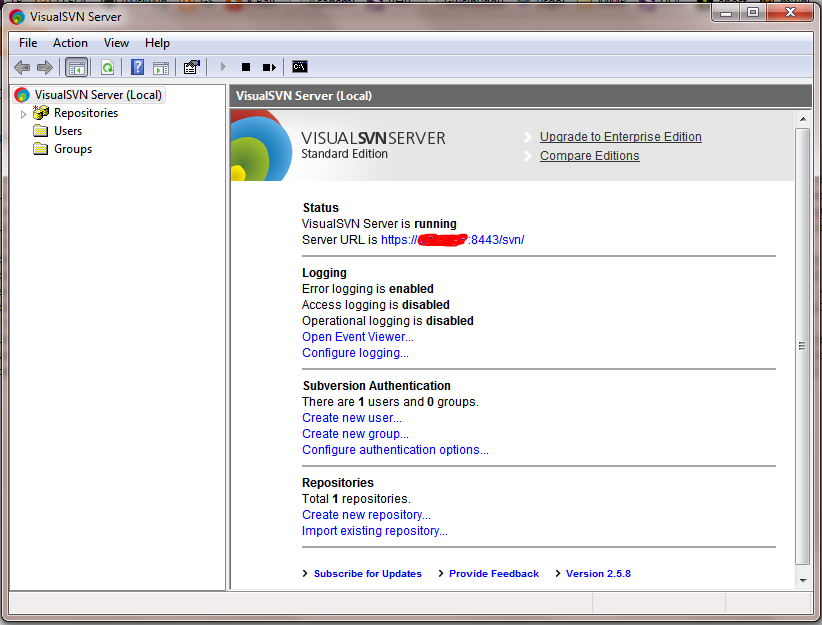
You won't be able to use this until you set up an user account, so, to do that, right-click on the 'User' folder in the left panel and 'Create User'. You should then see a dialog box asking you to provide details. This will be used for client access later on in Dreamweaver.

The next step is to create a new repository for your site, simply by right-clicking on 'Repositories' and choosing 'Create New Repository...'. You'll see a dialog box asking for the repository name - so give it a name - and you have the option of setting up additional structure such as branches etc. You may not need this, so feel free to not tick the check box at this point. You can always go back and add structure later on.
Right, that should do it for the server bit. Now on to adding Subversion (SVN) server details to our site in Dreamweaver. So, get into your site setup and enter the details similar to below (the scratched out entry is just the computername from the Subversion server url - without the 'https://' bit). Also ensure that you enter the correct port.

To avoid confusion 'diafol' in the 'Repository Path' is the name of the Repository I set up earlier - nothing to do with the username. Okay, once you've filled out the details, try testing it, and once saved, away you go!
The first thing you'll notice is the little '+' icons next to all your files and directories in the 'FILES' panel. In addition, you'll now have a 'Repository View' in the Servers View dropdown:

So how to get it to work?
Simply use the Check In and Check Out options from the shortcut menu when you right-click on a file or folder in 'Local view'. When you want to save a version to the repository, use Check In. You should then get a dialog asking you for the action required:
Once you've made your choice, press the 'Commit' button. The little '+' icon next to the file or folder should then disappear. If you now make changes to a file and save it and then 'Check In', you can check whether you have various revisions, either from 'Local view' or 'Repository view'. If you go to 'Repository view' and right-click on the file in question (common.php in this case), you'll get a shortcut menu.

Select 'Show revisions...' and you should see a list of revisions for that file:

You can then view a revision, or usefully, make a previous version the current one. This can then roll back your local version to the selected one on 'Check Out'.
I hope you found this post useful and that using SVN / Subversion is not as scary as it might first appear. Obviously, I've only scratched the surface and be aware that other alternatives to SVN exist. However, for day-to-day stuff for the average DIY hobbyist, this pretty much covers most of my needs.
It’s full of insightful information and entertaining descriptions!
ReplyDelete